When you are adding data to a spreadsheet in Microsoft Excel, it’s pretty common to either add some data that you wind up not needing or to forget about something and need to add it at a later time.
Fortunately, there are options in Excel that allow you to insert or delete entire rows from your spreadsheet.
Below is a video that provides more information on inserting or deleting rows in Microsoft Excel. We also discuss the steps for managing the rows in your worksheet in additional sections in this guide.
More Information on Inserting Rows in Microsoft Excel
While the default structure in Microsoft Excel provides you with a lot of empty rows at the bottom of the sheet, it’s not very useful when you need to include a row in between some data that you have already added ot your spreadsheet.
If you need to add an additional row in between some rows that already contain data, then you can use these steps.
- Open your Excel spreadsheet.
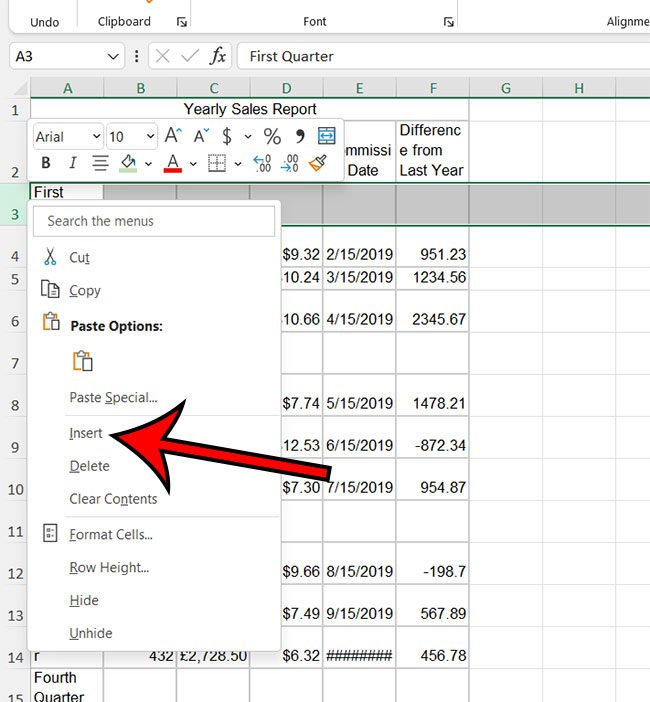
- Right-click on the row under where you want the new row.
- Choose the Insert option.
The next section discusses deleting a row in your spreadsheet that contains data that you no longer need.
How to Delete a Row in Excel
Excel spreadsheets are often the best choice available when you want to display a lot of data in an organized, sortable way.
But all of the data contained in a spreadsheet might not be important, and you may even decide that you want to delete some of it.
Fortunately, you can delete an entire row in Excel 2013 if it is not needed, allowing you to configure the spreadsheet to the point where it is only displaying the important information.
Deleting a Row from a Spreadsheet in Excel 2013 (Guide with Pictures)
The steps below are specifically intended to be used in a spreadsheet that you have opened in Excel 2013.
However, you can follow the same process to delete rows in other versions of Excel as well.
Step 1: Open the spreadsheet that contains the row you want to delete.
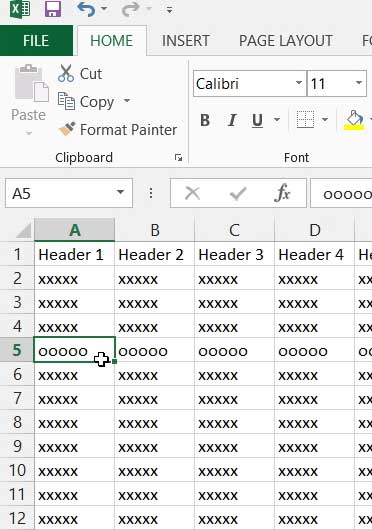
Step 2: Locate the row to delete.
In the example image below, I am going to be deleting row 5.
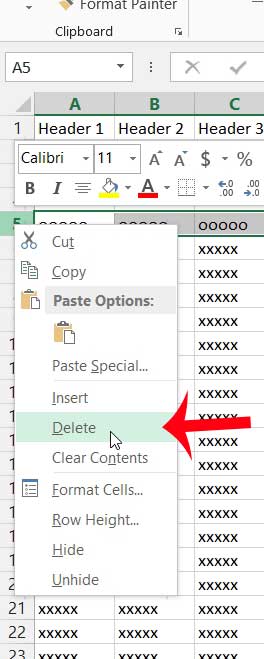
Step 3: Right-click the row number at the left side of the spreadsheet, then click the Delete button.
You can also delete a row by selecting it, clicking the Home tab at the top of the window, clicking Delete, then clicking Delete Sheet Rows.
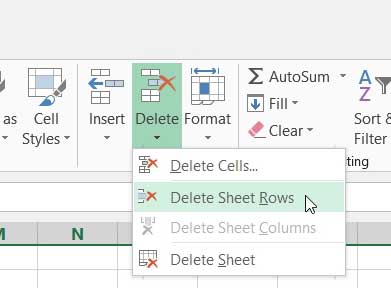
Now that you know more about inserting and deleting rows in Excel 2013, you can incorporate these methods to help you create the structure that you need for your data.
If you would like to make a row bigger, you can elect to expand the row. This is a good option if you have multiple rows of data with a cell that needs to be visible.
More Information on Deleting Rows in Microsoft Excel
Just as important as adding new rows to a spreadsheet is the ability ot get rid of rows in Microsoft Excel.
You may have already figured out how to remove the data from a cell by selecting it then pressing the Delete key or the Backspace key on your keyboard, but that will only get rid of the data in the cells, it won’t remove the cells themselves.
You can follow these delete row Excel steps to completely remove all of the cells and content in a single row of your spreadsheet.
- Open your worksheet in Microsoft Excel.
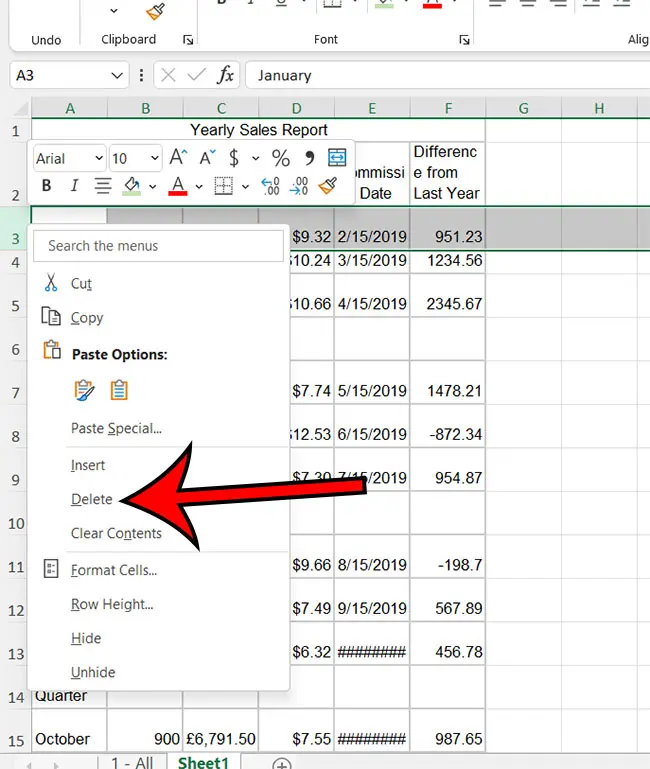
- Right-click on the row that you want to delete from the spreadsheet.
- Choose the Delete option.
Note that you can select multiple rows at once by clicking on one row, then holding down the Ctrl key and clicking other rows.
Once you have selected all of the rows that you would like to delete you can right-click on any of them and choose the Delete option to delete those multiple rows.
Webucator, a leader in online and onsite training courses, just created a great video that walks you through the process of inserting and deleting rows in a Microsoft Excel 2013 spreadsheet.
The video is very well done, and is presented in an effective way to help anyone that is looking to learn more about managing the rows in an Excel worksheet. The video that they created is below.
For additional helpful Excel videos like this, you can visit Webucator’s website to check out more of their Microsoft Excel classes.
They provide a large selection of training courses that are beneficial to a wide range of Excel skill levels, while also offering courses for users of Excel 2007, Excel 2010, Excel 2013, and Excel 2016.
For more information on some of the content feature in the video above, you can check out the link below.
How to Insert a Row in Excel 2013
Summary of Video on Managing Rows in Excel
Working with data in a Microsoft Excel worksheet often involves adding and deleting data in the cells that you have included in your worksheet.
You might have already figured out how to delete data from a cell, or how ot edit the data inside of a cell if you’ve made a mistake, but you can also choose to manage the rows and columns in the spreadsheet as well.
One way that you can do this is via the navigational ribbon at the top of the screen.
If you click on a row number on the left side of the sheet, or a column letter at the top of the sheet, it is going to select that entire range of cells.
You can then click the Home tab, then choose the Insert or Delete options in the Cells group in the ribbon.
Alternatively, you can right-click on a selected row or column, then choose the Insert or Delete option from that shortcut menu.

Matthew Burleigh has been writing tech tutorials since 2008. His writing has appeared on dozens of different websites and been read over 50 million times.
After receiving his Bachelor’s and Master’s degrees in Computer Science he spent several years working in IT management for small businesses. However, he now works full time writing content online and creating websites.
His main writing topics include iPhones, Microsoft Office, Google Apps, Android, and Photoshop, but he has also written about many other tech topics as well.
