After you have downloaded and installed Windows Live Movie Maker in Windows 7, you can begin to make adjustments to the videos on your computer.
If you have not yet installed this free program, you can follow the instructions in this article.
One adjustment available to you is the ability to change the aspect ratio from 4:3 to 16:9 (widescreen).
This setting is ideal for setting your video to use the maximum amount of space available on the screen on which you intend to view your video.
How to Adjust Video Aspect Ratio With Windows Live Movie Maker
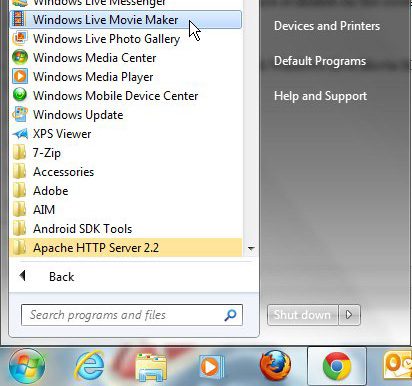
Step 1: Launch Windows Live Movie Maker.

Step 2: Click the “Click Here to Browse for Videos and Photos” in the center of the window.

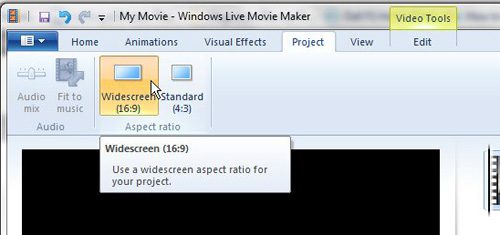
Step 3: Click the “Project” tab at the top of the window.

Step 4: Click the “Widescreen” or “Standard” button at the top of the window to switch between the different aspect ratios. Once you are done, you can save the video by clicking the “Movie Maker” tab at the top-left corner of the window.

Note that you might discover some significant differences in the appearance of your video content when you use this option to change a video away from the aspect ratio in which it was originally recorded.
It can be a good idea to completely review the entire video again after changing the aspect ratio to ensure that something important hasn’t been affected.
Conclusion
Now that you have familiarized yourself with the Windows Live Movie Maker interface, you can start exploring it a bit more ot see some of the options that it provides when it comes to modifying your video files.

Matthew Burleigh has been writing tech tutorials since 2008. His writing has appeared on dozens of different websites and been read over 50 million times.
After receiving his Bachelor’s and Master’s degrees in Computer Science he spent several years working in IT management for small businesses. However, he now works full time writing content online and creating websites.
His main writing topics include iPhones, Microsoft Office, Google Apps, Android, and Photoshop, but he has also written about many other tech topics as well.