You can produce a lot of interesting effects in Adobe Photoshop CS5 by using the options on the Filter menu.
There are so many different filters and ways to configure those filters that the possibilities are almost limitless. And when you combine those filters with different types of selections, you can perform what may seem like a complex task with only a few steps.
One such action that you can learn is how to blur the sides on an image in Photoshop CS5. Using an effect like this will add some artistic flair to a photograph, without actually making any significant changes to the image.
It will also serve to highlight the center portion of the image and push the extraneous pixels at the edges of the picture to the background.
Blurring Picture Sides with Photoshop CS5
One off the more popular sets of filters on the Filter menu is the Blur filters. Within this subset of options is the Gaussian blur, which we have previously written about using to blur the background of an image in Photoshop CS5. While blurring the sides of an image in Photoshop CS5 is similar to blurring the background, it is actually a simpler task that is going to require the use of a different set of tools than the ones required to blur the background. Read below to learn how to blur the sides of an image in Photoshop CS5.
Step 1: Open the image file that contains the sides that you want to blur in Photoshop CS5.
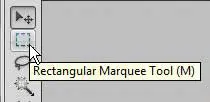
Step 2: Click the Rectangular Marquee Tool in the toolbox at the left side of the window.
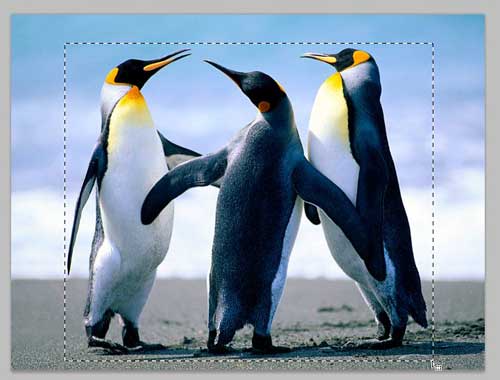
Step 3: Draw a box around the center of the image that you do NOT want to blur. In the image below, for example, I do not want to blur the penguins.
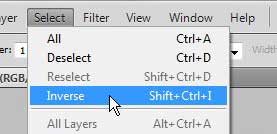
Step 4: Click Select at the top of the window, then click the Inverse option. This will select the rest of the image, which should just be the sides that you do want to blur.
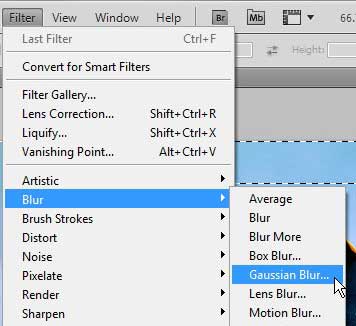
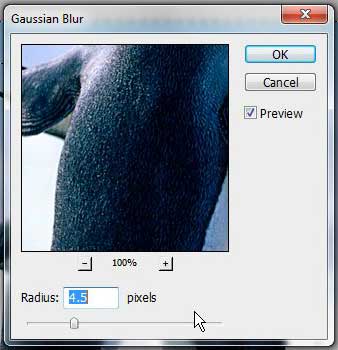
Step 5: Click Filter at the top of the window, click Blur, then click Gaussian Blur.
Step 6: Drag the slider at the bottom of the window until the sides of the image have the desired amount of blur, then click the OK button. If your image is not updating as you are moving the slider, then you will also need to check the box to the left of Preview.
Now that you know how to blur the sides of an image in Photoshop, you can use this technique to apply that look to the pictures you are editing.
Your image should now be clear in the center, while the sides are blurred. If you do not like the effect, you can press Ctrl + Z on your keyboard to undo the blurring of the sides of your Photoshop CS5 image.

Matthew Burleigh has been writing tech tutorials since 2008. His writing has appeared on dozens of different websites and been read over 50 million times.
After receiving his Bachelor’s and Master’s degrees in Computer Science he spent several years working in IT management for small businesses. However, he now works full time writing content online and creating websites.
His main writing topics include iPhones, Microsoft Office, Google Apps, Android, and Photoshop, but he has also written about many other tech topics as well.
