Creating a video or slideshow with your Windows 7 computer is a process that can take a lot of directions.
If you have Microsoft Powerpoint, then you may be able to just create a sequence of slides that display the images you want to show.
This is a perfectly acceptable solution for a lot of people, but it does not give you a solution if you want to create a video.
Fortunately, anyone with Windows 7 can download a video editing program called Windows Live Movie Maker for free.
The program interface is very user-friendly, and you have a number of tools at your disposal that should make it possible to do nearly anything you need to, including adding a song, audio or music file to your video.
How Do You Add Music to Move Maker?
If you have not already done so, you can read this article to learn how to download and install the Windows Live Movie Maker program.
Once the program is installed on your computer, then you can begin the process of adding sound to your video in Windows Live Movie Maker.
Step 1: Launch Windows Live Movie Maker by clicking the Start button at the bottom of your screen, clicking the All Programs link, then clicking the Windows Live Movie Maker option.
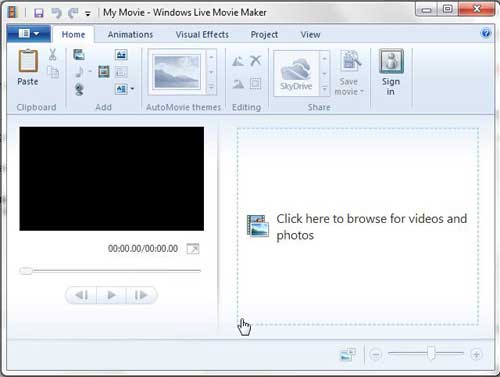
Step 2: At the center of the window is a link that says Click here to browse for videos and photos. Click that link, then double-click the video file to which you want to add your music or audio file. You do not need to select that sound file yet, though.
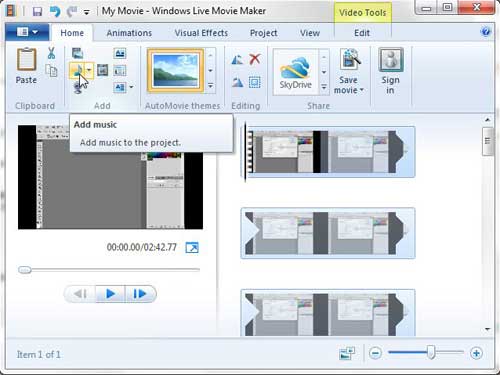
Step 3: Click the Home tab at the top of the window, then click the Add Music icon in the Add section of the ribbon.
If you are attempting to insert music at a specific point in your video, then you should first select that point in the video, then click the drop-down arrow to the right of the Add Music icon and choose the Add music at the current point option instead.
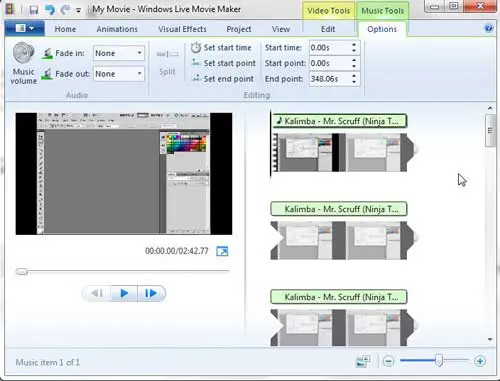
Step 4: Double-click the music or audio file that you want to add to your video. This will add a green banner above your video that displays the name of the audio file. It will also add a Music Tools tab at the top of the window.
Step 5: Click the Music Tools tab, which will change the options on the ribbon.
You can use these options to change how the music is associated with your video file. For example, you can adjust the volume of the music, set it to fade in or out, and you can modify the start point and end point of the song.
Now that you know how to add music or audio to Windows Live Movie Maker files that you are editing, you can improve the sound on the output videos from the application.
Once you have finished editing your video, click the blue Movie Maker tab at the top-left corner of the window.
If you think that you may want to make changes to the video at some point, choose the Save Project option.
If the video is finished and you just want to output it to a format that you can upload to the Internet or share with someone, use the Save Movie option to choose your desired output format.

Matthew Burleigh has been writing tech tutorials since 2008. His writing has appeared on dozens of different websites and been read over 50 million times.
After receiving his Bachelor’s and Master’s degrees in Computer Science he spent several years working in IT management for small businesses. However, he now works full time writing content online and creating websites.
His main writing topics include iPhones, Microsoft Office, Google Apps, Android, and Photoshop, but he has also written about many other tech topics as well.


