A new document in Microsoft Word is going to have one column by default. For documents that you create in a scholastic or corporate environment, this is likely the type of formatting that your organization would like you to use. But it may become necessary to add more columns to a document in Word 2013 when you are creating or editing different types of documents.
Adding columns to a document in Microsoft Word 2013 can be a good idea in a variety of situations. Whether you are composing an article for a newsletter, or typing up a list and trying to save space, many Word users will eventually discover that their document would look better if it had more than one column.
Our guide below will show you how to take an existing document and modify it so that the content of the document is laid out in a format with two (or more) columns.
How to Add a Column in Word 2013
- Open your document in Word.
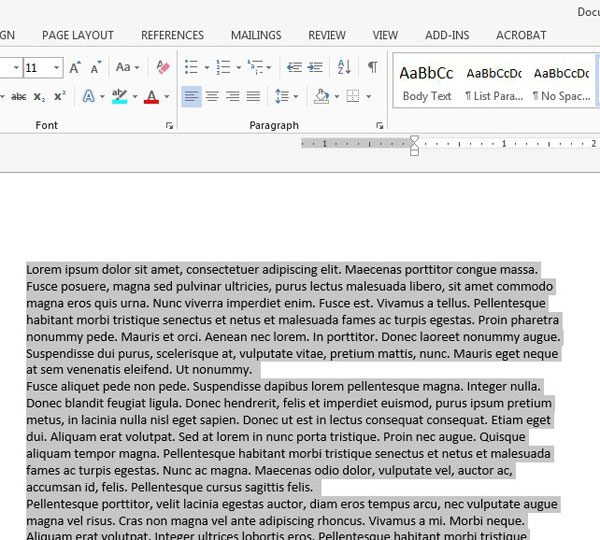
- Click anywhere in the document and press Ctrl + A to select everything.
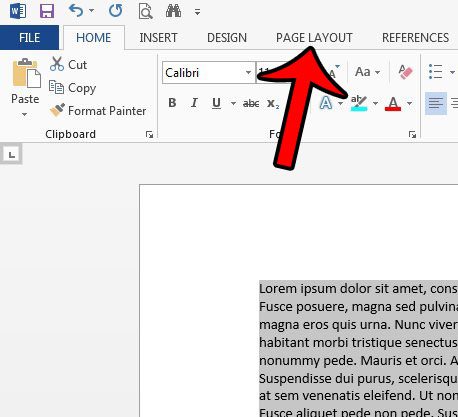
- Choose Page Layout at the top of the window.
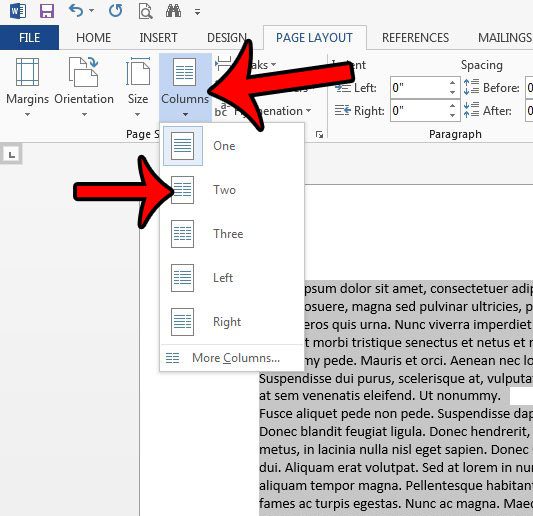
- Select the Columns button.
- Click the Two option.
Our guide continues below with additional information on adding columns in Word 2013, including pictures of these steps.
if you added a section break and don’t need it anymore, then click here to read our article on deleting section breaks in Word documents.
Adding a Second Column to a Document in Word 2013 (Guide with Pictures)
The steps in this article will assume that you currently have a document with one column. This is the default layout for a document in Word 2013. Our tutorial below will show you how to select all of the current text in the document, then adjust the layout of the document so that it is split across two columns.
Step 1: Open your document in Word 2013.
Step 2: Click inside the document, then press Ctrl + A on your keyboard to select the entire document.
If your document is currently blank, then you will not need to select the entire document. Additionally, if you only want to add columns to part of your document, then you can manually select that part of your document instead.

Step 3: Click the Page Layout tab at the top of the window.

Step 4: Click the Columns button in the Page Setup section of the ribbon, then click the Two option.
If you would prefer to use a different number of columns, then select that option instead.

Your document should have reformatted itself so that it is displayed with two columns on each page. Note that adding columns to your document will increase the amount of white space that is being used by margins. Learn how to change page margins in Word 2013 so that you can devote more of your multi-column to your document text, instead of the margins.
More Information on How to Add Word 2013 Columns
Our article above specifies adding a second column to a document that already has content in it, but you can also do this with a brand new document as well. If you are starting a new document you can skip the step in this guide that has you selecting all of the content in the document.
While you can adjust the Word document settings to add more columns, a similar method can be used if you want to remove columns instead.
As with any major document formatting change that you perform in Microsoft Word, this can affect the layout and location of document elements. After changing the number of document columns be sure to go back and proofread your document to ensure that everything still looks OK.
Microsoft Word has a variety of different types of breaks that you can use when you would like to manually stop content from appearing in a location and start appearing at the start of the next segment in a series. This includes things like a page break, a continuous section break, or even a column break. If you add a column break to a column in your document, that will tell Word that the next content in that column should appear at the start of the following column.
Using column breaks can be very helpful in perfecting the column layout in a document, but it can cause confusion later if you forgot that you did it. You can click the Home tab at the top of the window, then click the Show/Hide button to view formatting marks, including any manually inserted column breaks.
Some additional ways to customize column format can be found on the Columns dialog box. After you click the Page Layout tab, click the Columns button and choose More Columns at the bottom of the Columns drop down menu. Here you can specify column width and spacing, whether or not to use equal column width, and you can even choose to put a line between your columns.
Conclusion
Now that you know how to change the number of Word 2013 columns you should be able to create almost any type of columnized document that you may encounter. Whether it’s an article for a newspaper, a newsletter, or something where the standard single-column document layout isn’t ideal, the ability to add more columns to a document can really open up your document design.
Continue Reading
- How to insert a check mark in Microsoft Word
- How to do small caps in Microsoft Word
- How to center text in Microsoft Word
- How to merge cells in Microsoft Word tables
- How to insert a square root symbol in Microsoft Word

Matthew Burleigh has been writing tech tutorials since 2008. His writing has appeared on dozens of different websites and been read over 50 million times.
After receiving his Bachelor’s and Master’s degrees in Computer Science he spent several years working in IT management for small businesses. However, he now works full time writing content online and creating websites.
His main writing topics include iPhones, Microsoft Office, Google Apps, Android, and Photoshop, but he has also written about many other tech topics as well.