If there is a great font that you have found on a site like Google Fonts then you may want to use it in an image that you are editing on your computer. But there isn’t an obvious way to use new fonts in many image editing applications, so you might be wondering how to add new fonts in Photoshop.
Windows 7 computers come with a lot of good fonts by default. These fonts vary wildly in their styling, ensuring that you will find something to suit your needs, whether it is a serious font, a fun font, a script font, or something else.
However, Photoshop CS5 users often need to add something to their designs to make them really stand out for a crowd, and that is something that might not be possible using only your Windows 7 system fonts.
Therefore, if you want to know how to add fonts to Photoshop CS5, all you need to do is figure out how to add fonts to your Windows 7 computer, as those fonts will automatically be added to your Photoshop CS5 installation.
How to Add Fonts to Photoshop CS5
- Download the font to your desktop.
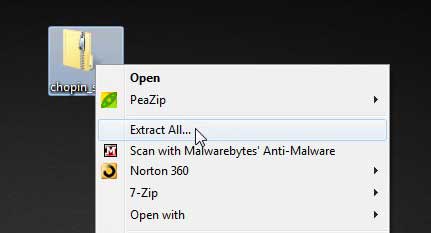
- Right-click the downloaded font, then click the Extract All option.
- Click the Extract button at the bottom of the window.
- Right-click on the extracted font file, then click the Install option.
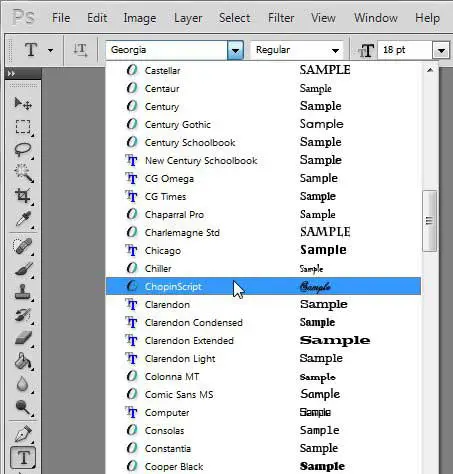
- Close Photoshop if it was already open, then launch Photoshop and find the font in the Text Type tool.
Note that this method is adding the font to your Windows font library, so it will also be available for other programs, like Microsoft Word and Excel.
Our article continues below with additional information on adding fonts to Photoshop, including pictures of these steps.
How To Add Fonts to Photoshop CS5 (Guide with Pictures)
Once you have acquired the font that you want to add to Photoshop CS5, you need to locate it on your computer. For the purpose of this tutorial I am using a font file called Chopin Script, which I found at Dafont.com. Most fonts are distributed inside of a zip folder, so you will need to extract the files form the zip folder before you can add the font to Adobe Photoshop CS5.
Step 1: Extract the font files by right-clicking on the downloaded zip file, then clicking Extract All.
Step 2: This will open a new window. Click the Extract button at the bottom of the window to extract the folder to the same location as your zipped file.
This will also open the folder to display the font files contained within.
Step 3: Right-click on the extracted font file within the folder, then click Install.
All of the fonts on your Windows 7 computer are located in the same folder, so you don’t need to take any additional action once the script has been extracted to get the font into Photoshop CS5.
You can confirm that you have added the font to Photoshop CS5 by launching the program, clicking the Text tool in the toolbar at the left side of the window, then clicking the Font drop-down menu to find your newly installed font.
With the font installed in Photoshop CS5, you are now free to perform all of the same actions on that font that you could with the default fonts, such as adjusting the size, adding layer styles, changing the color of the font, etc.
*After installing the new font in Windows 7, you may need to shut down Photoshop CS5 and restart it before you can see the new font in the font drop-down menu at the top of the window.
Now that you’ve added the new font, you are able to use it in Photoshop, and can even apply it to text in an existing text layer of your image.
How to Apply Your New Font to Text That’s Already in Your Photoshop File
If you’ve added your new font from dafont.com or Google Fonts, then you might be excited to try it out. But Photoshop isn’t going to update your existing text layers automatically, so you will need to change the font for a text layer if you want to use your newly-downloaded font.
Step 1: Open the Photoshop file containing the text layer that you want to change.
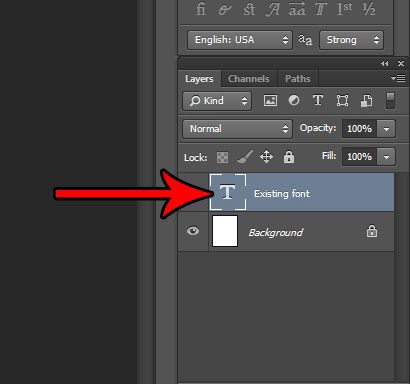
Step 2: Select the text layer from the Layers window at the right side of Photoshop.
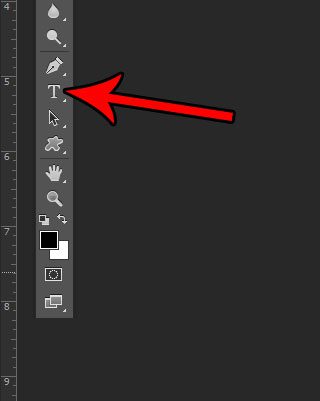
Step 3: Choose the Horizontal Type Tool from the toolbar.
Step 4: Click in the middle of your text to make the text layer active, then press Ctrl + A on your keyboard to select all of that text.
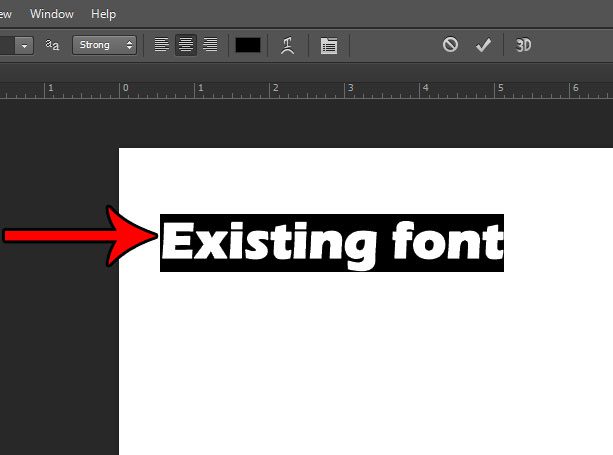
Step 5: Click the font dropdown menu at the top of the window, then choose the font that you just installed.
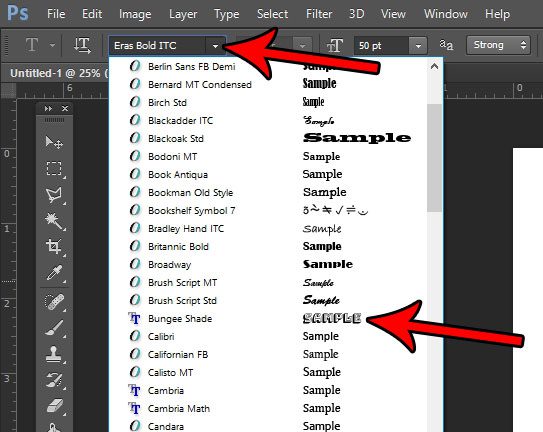
Your text layer should now be using the font that you just downloaded and selected.
Now that you know how to add fonts to Photoshop CS5, it should be much easier to find and use fonts that you want to use in your images.
*Many of the fonts that you find on Dafont.com and other similar sites may be free to download and use for personal purposes, but be careful if you intend to use the font on a website or for a commercial product. Most of these fonts will include a disclaimer that indicates what type of license comes with the font but, if you are unsure, contact the font designer to determine how you can use the font without fear of legal ramification.

Matthew Burleigh has been writing tech tutorials since 2008. His writing has appeared on dozens of different websites and been read over 50 million times.
After receiving his Bachelor’s and Master’s degrees in Computer Science he spent several years working in IT management for small businesses. However, he now works full time writing content online and creating websites.
His main writing topics include iPhones, Microsoft Office, Google Apps, Android, and Photoshop, but he has also written about many other tech topics as well.
