Managing the pictures on your iPhone is an important thing to do as your storage space starts to fill up.
You might have already figured out how to delete a single picture, or a few dozen pictures, you may be wondering how to bulk delete iPhone photos if you want to clear up a lot of space.
Our tutorial below will show you how to do this using a utility on your Mac computer.
How to Bulk Delete iPhone Photos
- Connect your iPhone to your computer with the lightning cable.
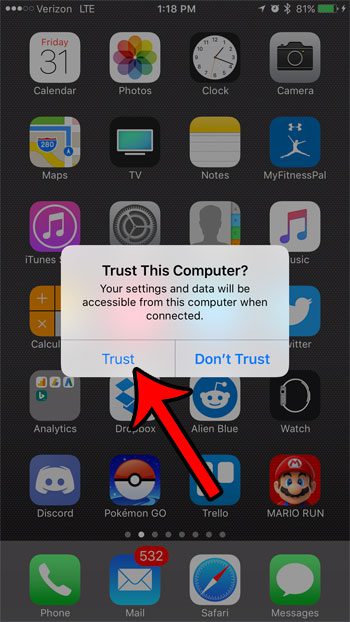
- Enter your passcode, then tap Trust.
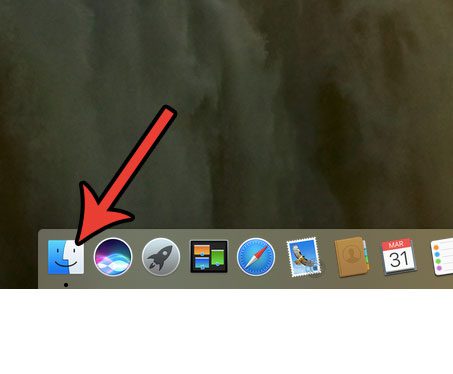
- Open Finder.
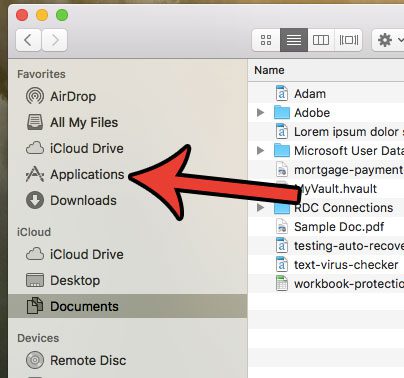
- Select Applications.
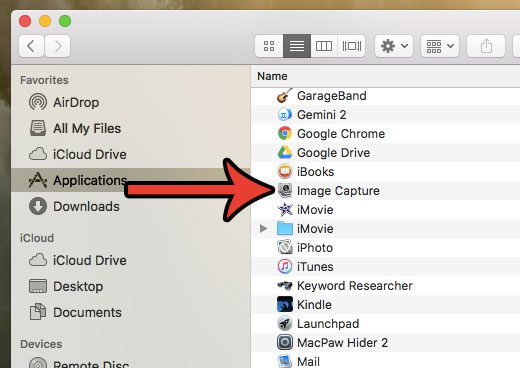
- Double-click Image Capture.
- Choose your iPhone.
- Click Edit, then Select All.
- Click Delete.
- Confirm the deletion.
Our guide continues below with additional information on how to bulk delete iPhone photos, including pictures of these steps.
Space issues are one of the biggest problems facing iPhone owners. Our complete guide offers some ways that you can free up storage space on your device, and one of the most effective options for increasing your available storage space is to delete your old pictures. But you may have hundreds or thousands of pictures on your iPhone and even though iOS 10 makes it a little easier to select a lot of pictures at once, you might be looking for a better way to bulk delete pictures from your iPhone 7.
One way to do this is via the Image Capture application on your Mac or MacBook. This utility provides you with an option for removing all of the photos from your iPhone at once. So continue below to see how you can use it regain some of the space on your iPhone.
Find out how to transfer photos from iPhone to computer if you want to save them somewhere and remove them from your phone.
How to Delete All Photos from an iPhone 7 Using Image Capture on Your Mac (Guide with Pictures)
The steps below were performed on an iPhone 7 Plus, in iOS 10.2. The Mac being used is a MacBook Air running the macOS Sierra operating system. You will need to have a lightning to USB cable to complete these steps.
Please note that this method only works if you have not enabled the iCloud Photo Library. If you have enabled iCloud Photo Library on your iPhone, then the delete button that we need to do this will not be visible. However, you will be able to open the Photos app on your Mac and delete your pictures that way.
Step 1: Connect the lightning cable to the iPhone, then connect the USB end of the cable to a USB port on your Mac.
Step 2: Enter your passcode or use your Touch ID to unlock your iPhone, then tap the Trust button to confirm that you want to allow the computer to make changes.
Step 3: Click the Finder icon in the dock.
Step 4: Click Applications in the left column of the Finder window.
Step 5: Double click the Image Capture application.
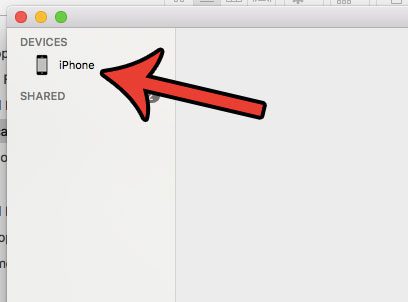
Step 6: Select your iPhone from the list of devices at the left side of the window.
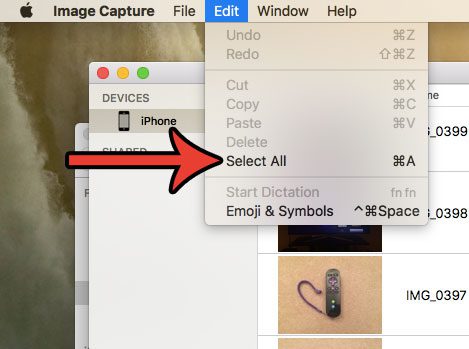
Step 7: Click the Edit link at the top of the screen, then click the Select All option.
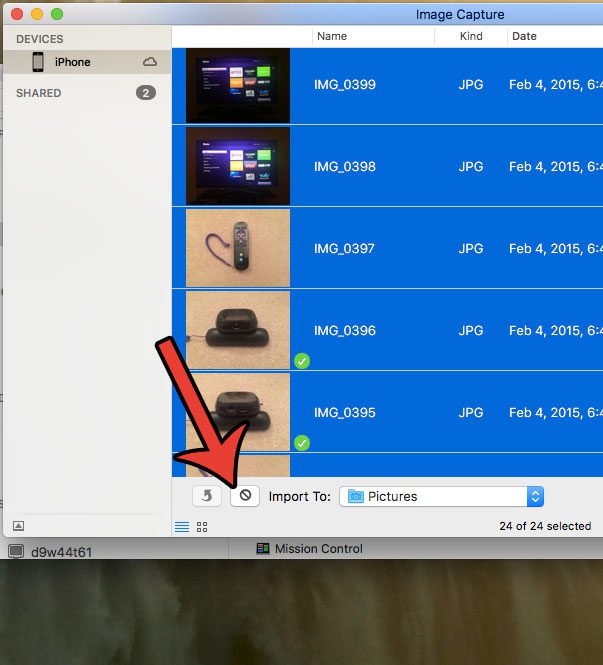
Step 8: Click the Delete button at the bottom of the window.
If you don’t see it, this means that you have enabled the iCloud Photo Library on your iPhone, so you will need to delete your pictures from the Photos app on your Mac instead.
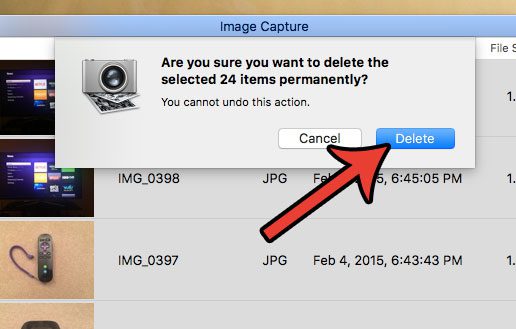
Step 9: Confirm that you wish to delete these pictures from your iPhone.
Now that you know how to bulk delete iPhone photos you will be able to complete this process if you are running out of storage and are looking for an effective solution.
How to Disable Photo Stream on iPhone
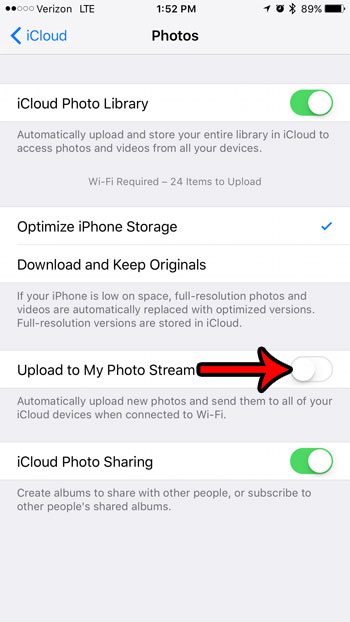
If you still have pictures on your iPhone after this, then it might be due to Photo Stream being enabled. You can turn that off by completing these steps.
Step 1: Tap the Settings icon on your iPhone.
Step 2: Scroll down and select the iCloud option.
Step 3: Tap the Photos option.
Step 4: Turn off the Upload to My Photo Stream option.
Is your Mac starting to run out of space, too? Learn how to remove the junk files from your computer and free up space for other files and applications.
Additional Sources

Matthew Burleigh has been writing tech tutorials since 2008. His writing has appeared on dozens of different websites and been read over 50 million times.
After receiving his Bachelor’s and Master’s degrees in Computer Science he spent several years working in IT management for small businesses. However, he now works full time writing content online and creating websites.
His main writing topics include iPhones, Microsoft Office, Google Apps, Android, and Photoshop, but he has also written about many other tech topics as well.